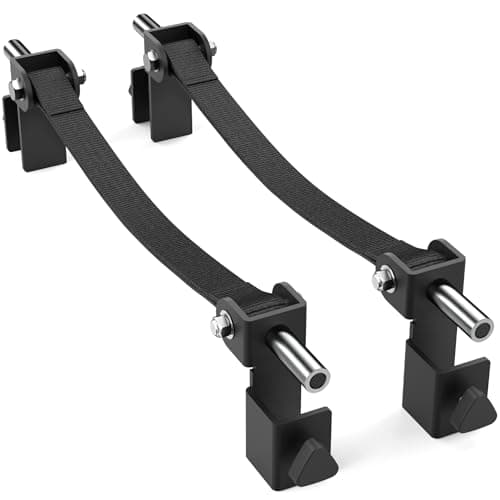
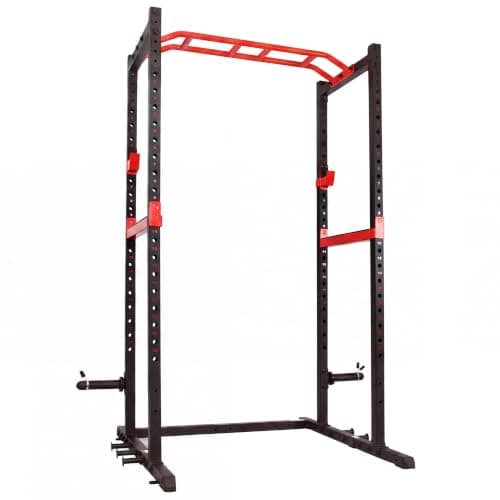
Two heights decide whether a rack does its job: the safeties, and the J-hooks. Everything else is assembly. Both are set by standing in the rack with an empty bar, not by reading a number off a chart. Whether the rack also needs anchoring to the floor is a separate question with a separate answer — do you need to bolt down a power rack.
Setting the safeties for squats
The rule is simple: the safeties must sit just below the lowest point the bar reaches in a full-depth rep, and no lower. Too high and you clip them on a good rep, which is dangerous in its own way — the bar stops while you are still moving. Too low and a failed rep dumps you further than necessary before anything catches.
To find it, load nothing, get under the empty bar, and squat to your real depth while someone watches, or film it. Mark where the bar sits at the bottom. Set the safeties one hole below that. Then test it: squat down to the bottom and let the bar settle onto the safeties deliberately, so you have felt the catch before you ever need it under load.
Setting the safeties for bench press
This is the setting people get wrong, and it is the one most likely to matter. The safeties need to be just below your chest at the bottom of the press — low enough that a full-range rep does not touch them, high enough that a failed bar does not land on your ribcage before it lands on steel.
The complication is that bench height varies. Set this with the actual bench you will use, in the position you will use it, every time you change benches. If the hole spacing on your rack is coarse, you may find no hole is quite right — which is exactly why hole spacing through the bench range is a buying criterion, and why strap safeties are worth considering: they hang at an arbitrary height rather than a fixed hole, and they catch a bar more gently than steel.
Setting the J-hooks
For squats, the bar should sit at roughly upper-chest height — high enough that you are not squatting to un-rack it, low enough that you are not on your toes to put it back. The common error is setting them too high, because it feels easier when the bar is empty and becomes genuinely difficult when it is loaded and you are tired.
For bench, the hooks go low enough that you can un-rack with a nearly straight arm without shrugging off the bench, but not so low that you are pressing the bar out of the hooks from a dead stop. Again: set it with the bench in place and an empty bar, then leave it.
Placement in the room
Leave clearance you have not thought about
Plan for the bar, not the rack. A seven-foot bar needs room to be loaded and unloaded from both sides, which means clearance well past the frame width on each side. Then add space to walk out of a squat if you use a rack you step back from, and headroom above the pull-up bar if you intend to use it.
Get the floor right first
A rack on an uneven or soft floor will feel unstable no matter how good the steel is. On concrete, check for slope and shim the feet if needed. If you are putting flooring down, put it down before the rack goes up rather than trying to slide mats under it later — our flooring guide covers what belongs under a loaded frame.
Anchor it, or load it, if it moves
Open racks and squat stands can shift under a heavy un-rack. The two fixes are bolting to the floor or loading the base with plates where the design allows. Our anchoring guide covers both, including what to do when bolting into the slab is not an option.
Assembly steps people skip
Two habits prevent most of the problems that get blamed on the rack itself. First, leave every bolt finger-tight until the whole frame is standing, then tighten in stages working around the frame — tightening as you go locks the frame slightly out of square and you will fight it for the rest of the build. Second, re-check the bolts after the first couple of weeks of use. Fasteners settle. A rack that develops a rattle has almost always just loosened.
Keep the hardware you did not use. The single most annoying failure in this category is losing a pin or a bolt years later and discovering the brand no longer stocks it.
A five-minute check before every heavy session
Look at the safeties and confirm they are where you left them and both sides are in the same hole — a mismatched pair is the classic garage-gym error. Confirm the J-hooks are seated. Give the frame a firm shove to confirm nothing has walked. It takes less time than warming up, and it is the difference between a rack that is set up and a rack that merely exists.
Once it is set, the rack should be the piece of equipment you stop thinking about. If you are still choosing one, start with the best power racks or the buying guide.