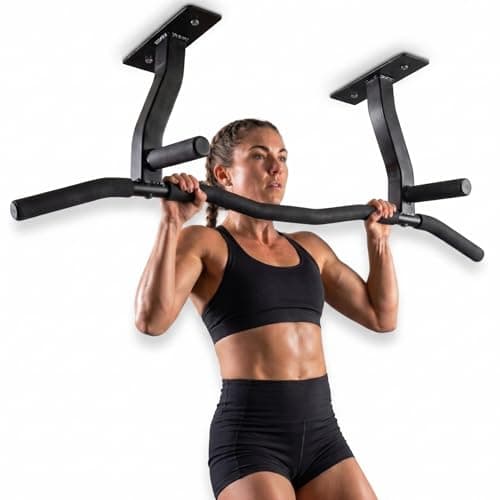
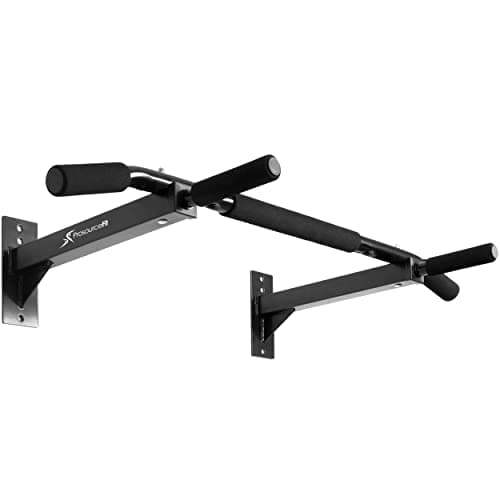
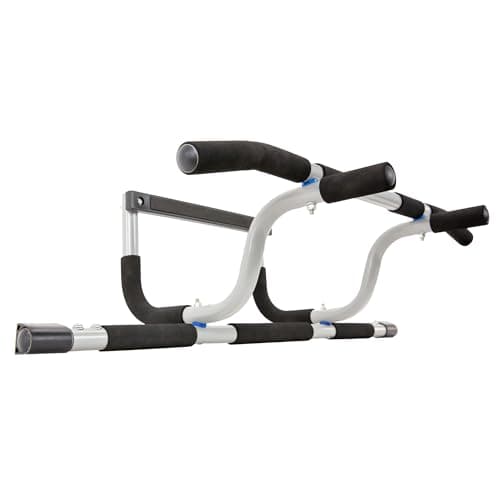
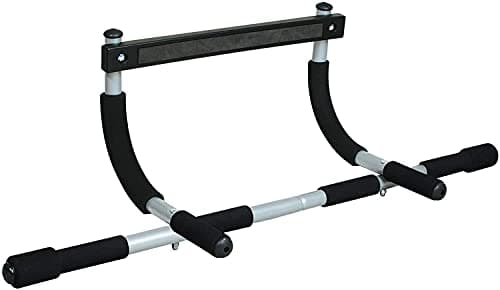
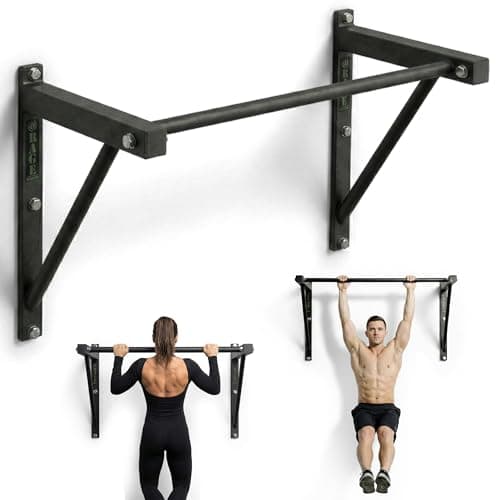
Buy the mount, not the bar. If you own the wall, bolt a bar into the studs or the ceiling joists and be done with it for twenty years. A doorway bar is a compromise for people who cannot drill — a good one, but a compromise. Every real difference in this category comes down to where your bodyweight ends up when you hang.
Why the mount is the whole product
Strip a pull-up bar down and there is almost nothing to it: a steel tube, a pair of brackets, some foam over the grips. There is no bearing, no pin, no cable and no upholstery. Compared with nearly everything else in a home gym it is close to indestructible, which is exactly why the bar itself is the least interesting part of the decision.
What varies enormously is the load path. Hang from a bar lagged into two wall studs and your weight travels through the lag screws into structural lumber, then down into the foundation. Hang from a leverage-mounted doorway bar and your weight travels into the door casing, the trim and the drywall above the opening — carpentry that was installed to look tidy, not to carry a person. Both arrangements work. Only one of them is a buy-it-for-life purchase.
That is the same reasoning we apply to a rack: on the power rack roundup the frame outlives everything bolted to it, and on anchoring a squat rack the anchor is what turns a heavy object into a safe one. A pull-up bar is the smallest, cheapest version of the same problem — and the reason a 300 lb bar lagged into joists is a more secure hang than a 660 lb freestanding frame, which we work through in power tower weight limits explained.
The three mounts, and what each one costs you
Wall-mounted — the default if you own the wall
Two brackets, four to eight lag screws, a pair of studs. It is the strongest common mount, it is inspectable forever (you can see every fastener), and the bars that use it are the ones willing to publish serious capacity numbers. The trade is clearance: because the bar hangs off a wall, the arms have to hold you far enough out that your heels and knees clear the drywall on the way up. Bars that publish a standoff figure are telling you they have thought about this.
Ceiling-mounted — the garage answer
Bolted up into joists, a ceiling bar puts open air behind you in every direction, which is why it is the mount of choice for anyone who wants hanging leg raises and knee tucks without clipping a wall. It also uses no wall space at all, which matters in a garage where the walls are already carrying shelving, a plate tree and a bike. The trades are that you are drilling overhead, that joist direction dictates which way you face, and that every rep is audible in the room above or below.
Doorway — the renter's bar
Two families exist here and they are not equivalent. A leverage bar hooks over the casing and uses your own weight to clamp itself; nothing is drilled and nothing is permanent. A telescoping pressure bar tensions itself between the two sides of the frame and relies on friction — that is the design that occasionally lets go, and it is not one we rank. Both send the load into trim rather than framing, which caps how good any doorway bar can be. If you rent, that cap is the price of not losing your deposit, and it is worth paying.
What we rank on
- Where the load ends up. Framing beats trim, every time. A bar into studs or joists scores above a bar into a door casing no matter how well the doorway bar is made.
- A published capacity. Amazon lists a "maximum weight recommendation" on almost every one of these. A manufacturer willing to state 500 lb has specified the steel and the brackets; one that states nothing has told you nothing.
- Clearance. The distance the bar sits from the wall and above the trim decides whether you can actually complete a rep. It is the spec buyers discover last and regret first.
- Grip options. Wide, narrow and neutral hand positions change which muscles do the work and let you keep training when one grip aggravates an elbow. Multi-grip frames earn their extra steel.
- What it costs the building. Holes you can patch, trim you cannot, and noise you have to live with. We say plainly which bar does what to your house.
Measure these four things before you order
- Your framing interval. Wall studs and ceiling joists in US residential construction are normally spaced 16 or 24 inches on center. Find two with a stud finder, confirm with a small pilot hole, and buy a bar whose bracket spacing matches. A bar that only fits 16 inch spacing is useless over 24 inch joists.
- The standoff you need. Stand facing a wall, hold your arms overhead, and have someone measure from the wall to your knuckles — then add room for knees. Roughly two to three feet of clearance is what makes a wall bar comfortable; the Rage bar publishes 36 inches for exactly this reason.
- Doorway width, depth and molding. Doorway bars publish all three and buyers read none of them. Width sets whether the bar spans at all, trim-face-to-trim-face depth sets whether the leverage arm has something to bear on, and molding width sets whether the hooks seat properly.
- Headroom above the bar. You need your chin above it and your head below the ceiling. This is the reason short-ceilinged rooms end up with a doorway bar even when the owner would rather bolt one to the wall — the same headroom problem that shows up on our short rack review.
How to read a pull-up bar's weight rating
Every rating on this page is a static, manufacturer-stated number: the weight the frame is said to support with a person hanging on it. A pull-up is not static. Dropping into a dead hang, kipping, and adding a weight belt all raise the peak force above your bodyweight, sometimes by a large multiple for a fraction of a second. Nobody publishes a dynamic figure, so the sane way to use the static one is as headroom rather than as a target.
Practically: a 300 lb rating is generous for a 180 lb lifter doing controlled reps, and it is thin for a 240 lb lifter who trains weighted and finishes sets by letting go. If either description fits you, buy the 500 lb bar. It is the cheapest margin you will ever purchase — the same argument we make about published capacities on the weight bench capacity page and in the power rack steel gauge guide.
And treat an unrated bar as unrated. Not weak, not dangerous — simply unknown, which for a product whose only job is to hold a human being is a strange thing for a manufacturer to leave out.
The hardware is the part that fails, not the bar
Almost every pull-up bar horror story is a fastener story. The bar did not bend and the welds did not crack; the screws pulled out of drywall, or a hollow-wall anchor tore through gypsum, or the lag screws never reached the stud behind it.
- Lag screws into framing, always. A lag screw is a heavy wood screw with a hex head, designed to be driven into solid lumber and torqued with a wrench. It is the correct fastener for a wall or ceiling bar, and it must bite into the stud or joist itself — an inch and a half of drywall does nothing.
- No drywall anchors. Ever. Plastic expansion anchors and self-drilling anchors are rated for picture frames and towel bars. Toggle bolts are stronger and still wrong here, because they load a sheet of gypsum in bending.
- Use the hardware that came in the box, and buy longer if the wall is thick. Over half-inch drywall a 3 inch lag reaches roughly 2.5 inches into the stud. Over plaster and lath, or two layers of board, you need more length to reach the same depth.
- Concrete gets concrete anchors. Several of these bars state compatibility with concrete or cement walls, which means masonry sleeve or wedge anchors and a hammer drill, not the wood lags in the bag.
- Re-torque after the first month. Wood compresses slightly under the bracket and fasteners settle. One wrench check at week four, then once a year, is the entire maintenance schedule for a bolted pull-up bar.
What actually wears out
In this category, almost nothing. A steel tube bolted to framing has no mechanism to fail. Rank the consumables and the list is short: the foam grips go first, hardening and splitting after years of chalk and sweat; the powder coat wears through where your hands live, and that patch can surface-rust in a damp garage; and the fasteners loosen slightly and want re-torquing. All three are trivially fixable, which is what makes a bolted bar one of the few pieces of home gym equipment that genuinely deserves the phrase we built this site around — see home gym equipment that lasts. The same is true of the accessory that comes next: once bodyweight pull-ups stop being hard, a dip belt is a strap, a chain and two hooks, and it is the cheapest progression you will ever buy.
Doorway bars have a longer wear list because they have more parts: foam, plastic couplers or end caps, and the padded contact points that press against your trim. They also do slow, cumulative damage to the doorway itself — compression marks on the casing and scuffed paint above the opening are normal, not defects.
When you should not buy a pull-up bar at all
If you own a full cage, you already have one. Almost every power rack ships with a pull-up bar across the top, which is why our power rack versus power tower comparison ends the way it does. Buying a second bar for a room that already contains a rack is the definition of a redundant purchase — the money is better spent on an attachment the rack does not have, usually dip bars or a lat tower — and once those dips stop being hard, a dip belt is how you keep progressing. If you have no rack and want dips and knee raises off a freestanding frame rather than a mounted bar, that is a different product, ranked in the best power towers and, for bodyweight training specifically, in the best power towers for calisthenics. We settle the either/or in power tower vs pull-up bar.
The exception is genuine: rack bars are fixed at one height and one or two grip widths, and on a short rack the bar can sit low enough that tall lifters have to tuck their legs. If that is your situation, a ceiling bar in a different part of the room solves a real problem rather than duplicating an existing one.
Where a pull-up bar sits in a buy-it-for-life gym
Early, and simply. Vertical pulling is the movement a barbell-only gym is worst at covering, and a bolted bar is the plainest way to fix it: no cable, no pulley, no stack, nothing to service. When bodyweight alone stops being enough you can add a lat pulldown attachment or step up to a functional trainer — but both of those are mechanisms with consumables, and a bar lagged into framing is not. It is the piece most likely to still be on the same wall in twenty years, which is the only durability test this site really cares about. If you are still assembling the room, our what to buy, in what order guide puts the whole sequence together.